")
")
I had a leak on the third injector. After starting, I could smell a strong fuel odour. When I opened the hood I found fuel on the manifold next to the injector of the third cylinder.
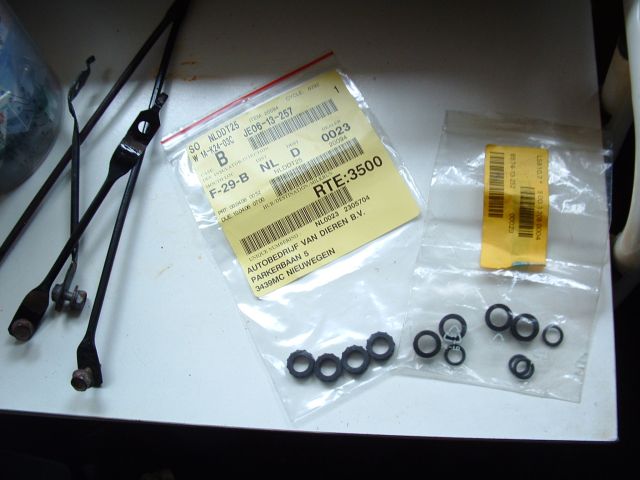
At the dealership I bought a replacement set for all rubbers and seals.
Replacement in itself is not a difficult job but you have to pay attention to what you are doing. After all, you are working with fuel and a pressurized system.
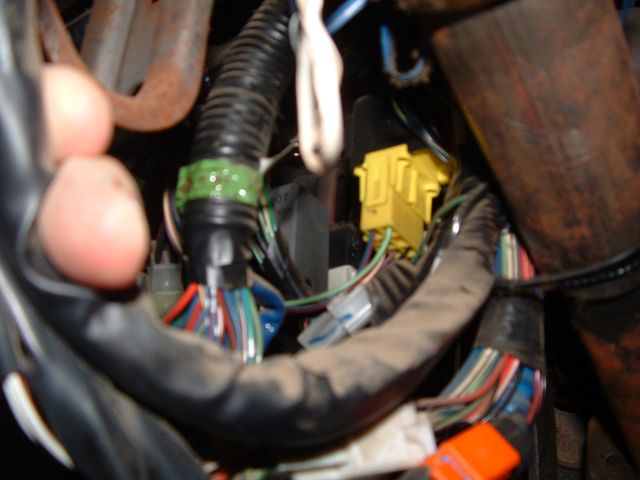
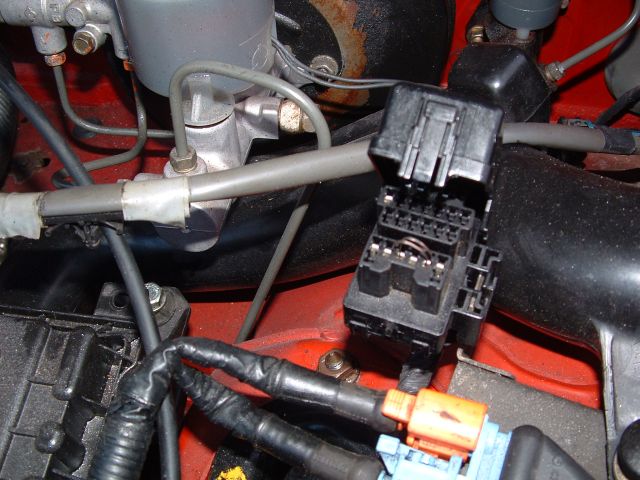
First you must make sure that the fuel line pressure is released. This goes as follows: Remove the kick-plate under the steering column. You will then see a large bunch of cables. Somewhere in between is the fuel pump relay (next to the steering column). The plug and bottom are yellow.
Now go ahead and start the car.
Then pull this (yellow) plug from the relay. The car will now cut off because the fuel supply stops. The system is now depressurized. If, like me, you are dealing with a rather intensive leak, it might be advisable to do a 'dry' test run so the car does not have to run for long.
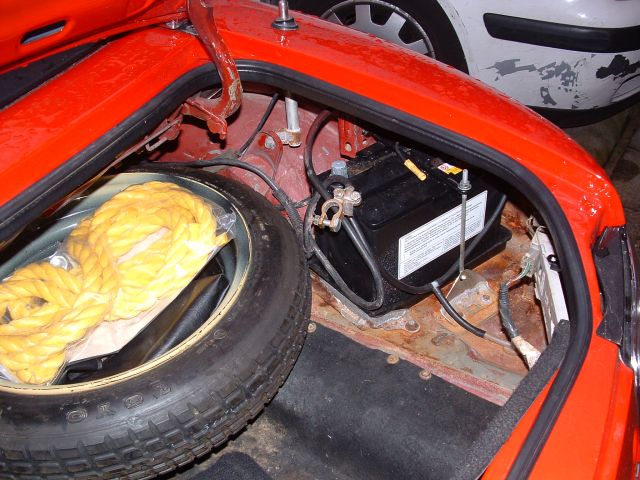
Now release the battery in the trunk. Under no circumstances do we want to cause a spark!
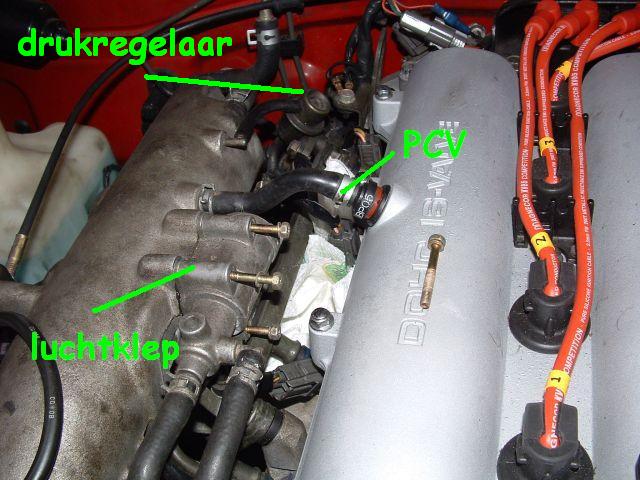
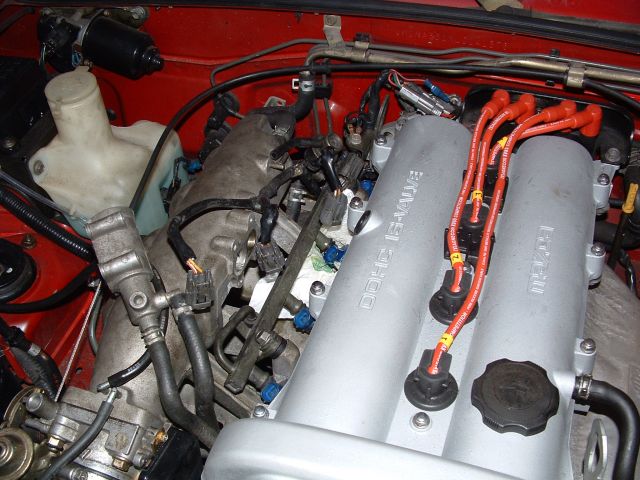
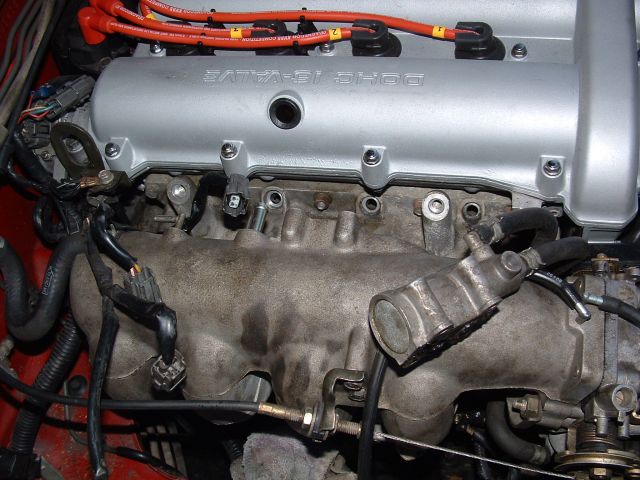
Now you can get to work under the hood. First the air valve must be removed (four bolts). And then the PCV (Positive Crankcase Ventilation) and the connectors of the injectors. Squeeze and release.
Now first disconnect the fuel supply and return line. Mark the lines with a marker or a piece of tape so you know what goes where. To aid in assembly later on.
Sometimes the hoses don't come off easily. After all, they have been fitted for quite a few years. To make it a little easier, I put something between the hose and the connection (i.e., the tip of a knitting needle or a small flat screwdriver), and then I spray a little penetrating oil into the opening that has been created. Due to the capillary action, this releases the hose from the pipe and with a little effort, it should come loose a lot easier.
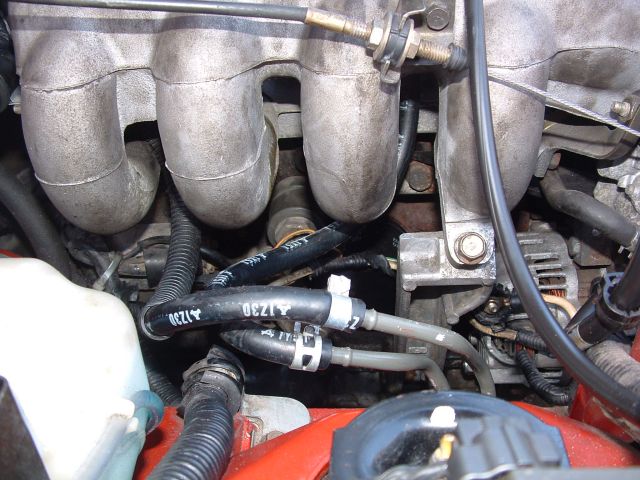
ATTENTION: fuel will flow from the steel pipe! This must be capped! For example, by inserting a bolt wrapped in a piece of fabric.
Now you can remove the fuel pressure regulator at the rear of the fuel rail (near the fourth cylinder). Two bolts hold it in place. Also remove the vacuum hose.
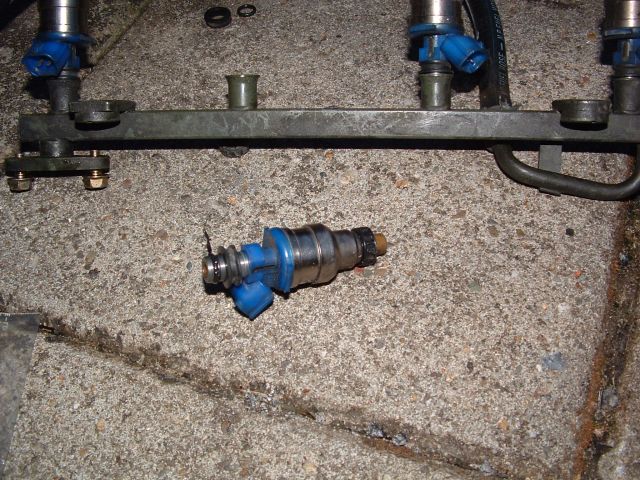
After that you can also remove the fuel rail. This is attached to the block with two bolts. (front and back).You can then carefully lift the whole assembly with the injectors (tilting slightly upright should give you enough room to take them out). Ensure that the gaskets do not stay behind or fall in to the head.
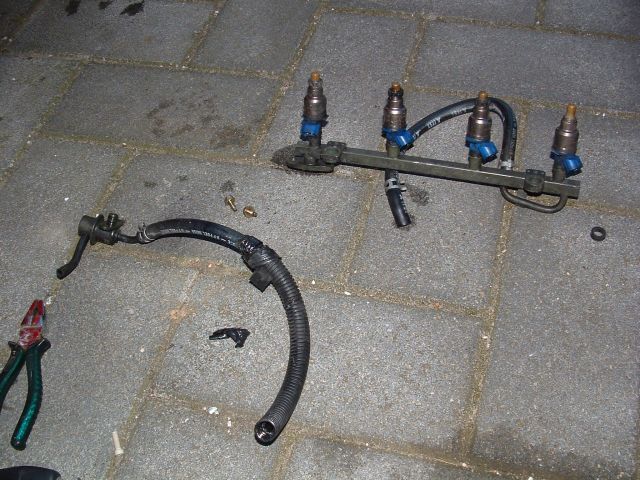
You can pull the injector out of the rail. It is only held in place by the gasket ring between them. When replacing this ring, use a small drop of oil on it to prevent damage when replacing.
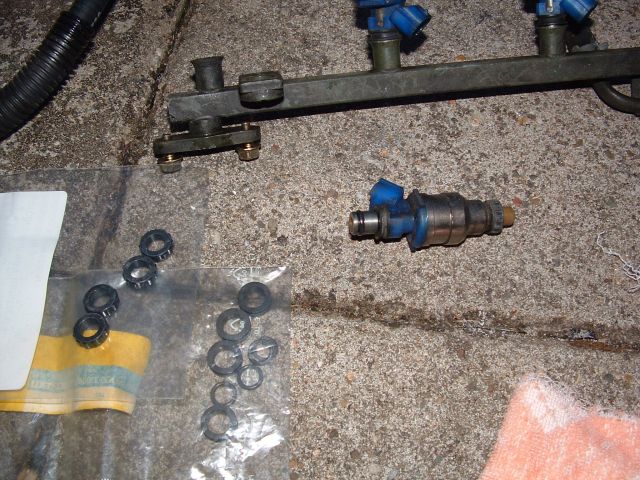
The gasket ring was indeed damaged on the third-cylinder injector (unfortunately, the photo does not show this very well).
At the same time I replaced the O-ring, the cuff and the washer of all four of the injectors. And of course, took my time to clean the injectors
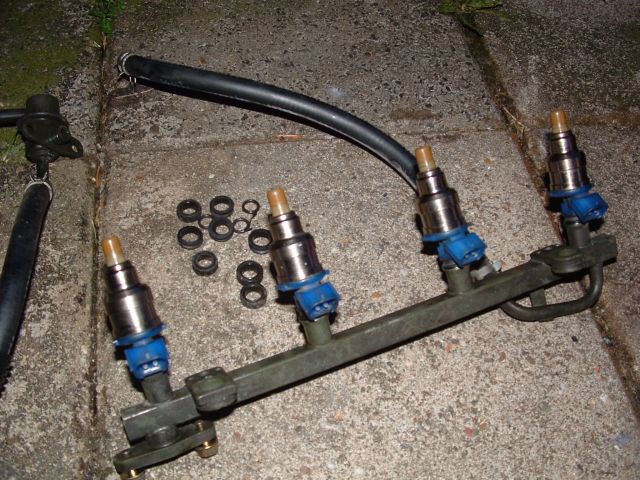
Putting it back on is the reverse of dissassembly. The washers did not stay on the injectors by themselves, so I first placed them in the recess in the block. Then carefully lowered the fuel rail with the injectors on them. Put the pressure regulator back on. Then reconnect the fuel hoses. Insert the connectors of the injectors, connect the vacuum hose of the pressure regulator. Put the air valve back on and the PCV in again. And then you are almost ready to start.
Before you start the fuel system first has to be primed.
First insert the yellow connector under the steering column. After this reconnect the battery.
Under the hood find the diagnosis connector at the divers side.
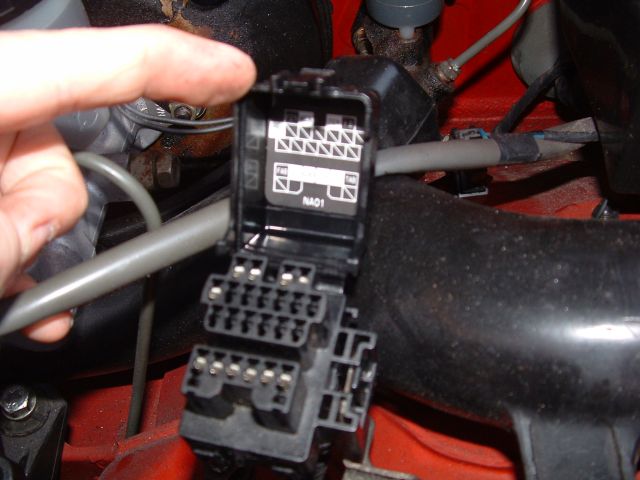
To prime the system you have to connect F/P and GND. I.e. with a bent paprclip or piece of wire. After this switch on the ingnition, but do not start, for about 10 seconds. If you have done this right you can hear the fuel pump running behind you.
Remove the paprclip/wire and close the cap. Check the injectors and connections for leakage.
Now, if everything is in order, you can start the car. Mine worked first time around! Take the car for a spin around the block and check again for leakage. Everything a ok? You've earned yourself a beer!
Torque specifications:
2 bolts of the fuel rail: 19-25 Nm
2 bolts of the fuel pressure regulator: 7,8-11 Nm
4 bolts of the air-valve: 4,9-7,8 Nm
PS: if you are nitpicking you should also replace the O-ring from the fuel pressure regulator!