")
")
If you want to mount a new radio it may be necessary to disassemble the center console (in particular to remove the original Mazda radio). Even if, for example, you are going to connect an extra set of speakers, a CD changer, iPod connection or amplifier, it is still necessary to access the rear of the radio.
What do you need:
- Phillips head screwdriver
- piece of rope (about 40/50cm, 1,5foot)
piece of wire
Start:
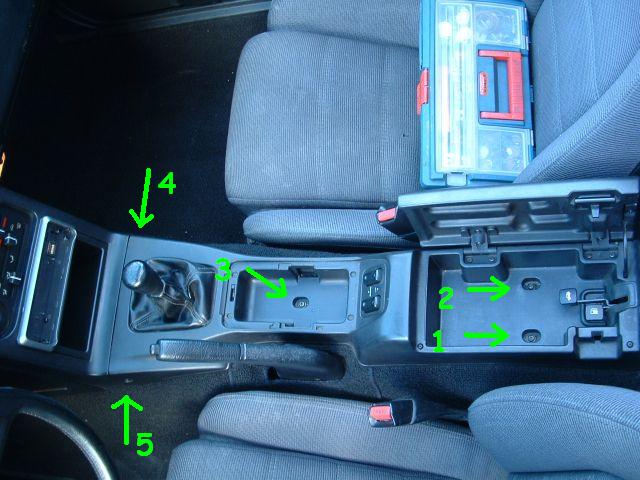
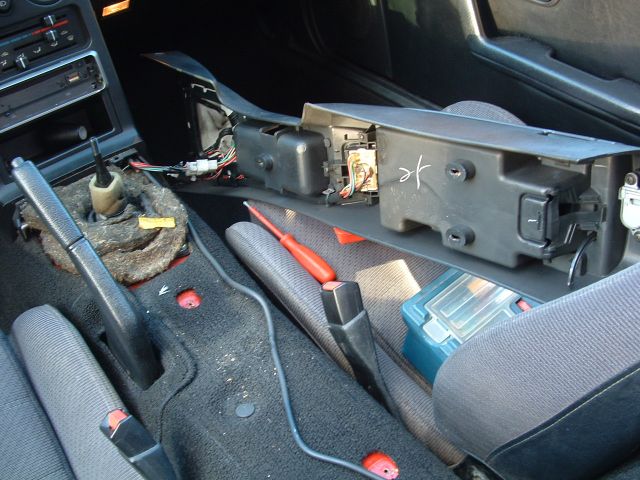
first remove the ash tray and clean out the storage compartment:

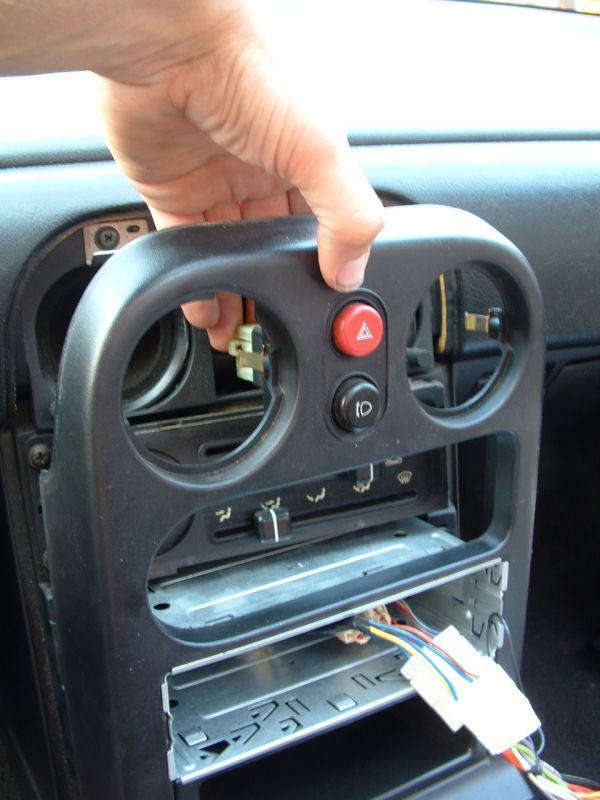
then undo 5 (Five) Phillips head screws. 2 inside the storage compartment, 1 under the ash-tray and 2 on either side at the front:
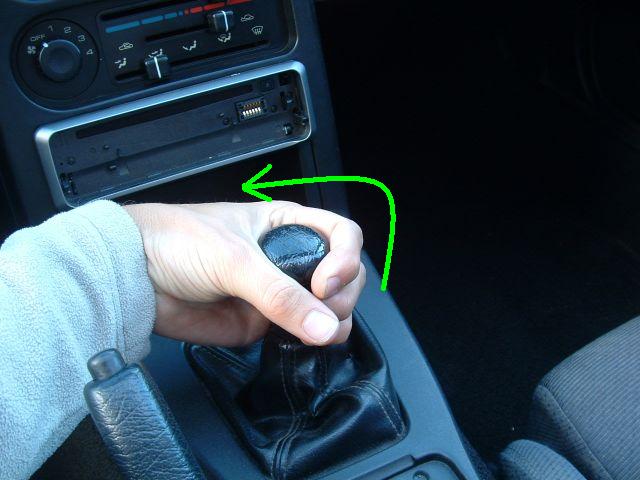
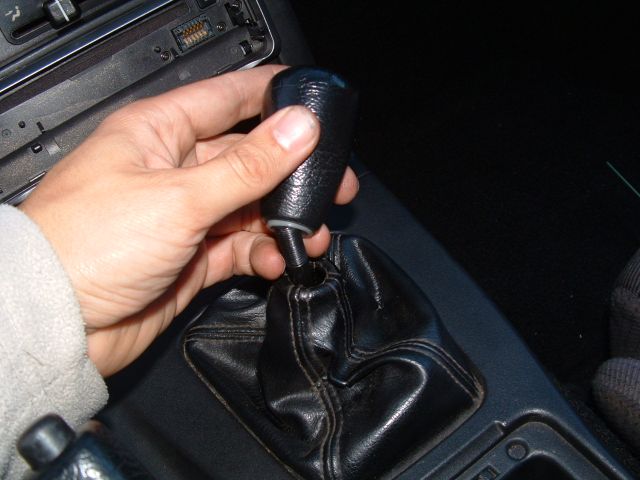
Next remove the gear knob. Take a firm grip and turn counter clockwise:
Then you can remove the center console. Lift the front first and then pull forward a little to release the levers of the tank and boot. Then you have the choice to ór undo the connectors of the windows (when fitted) and ashtray light, ór tilt the console to the side and leave it aside.
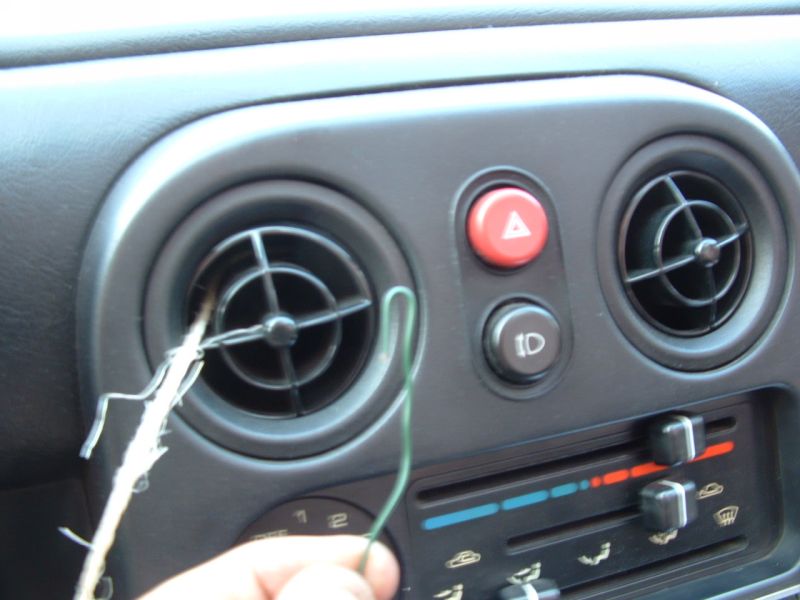
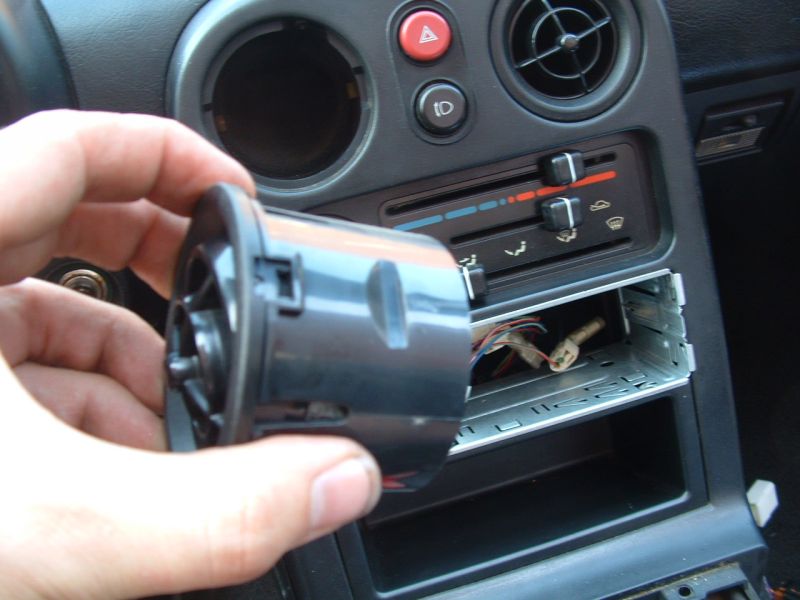
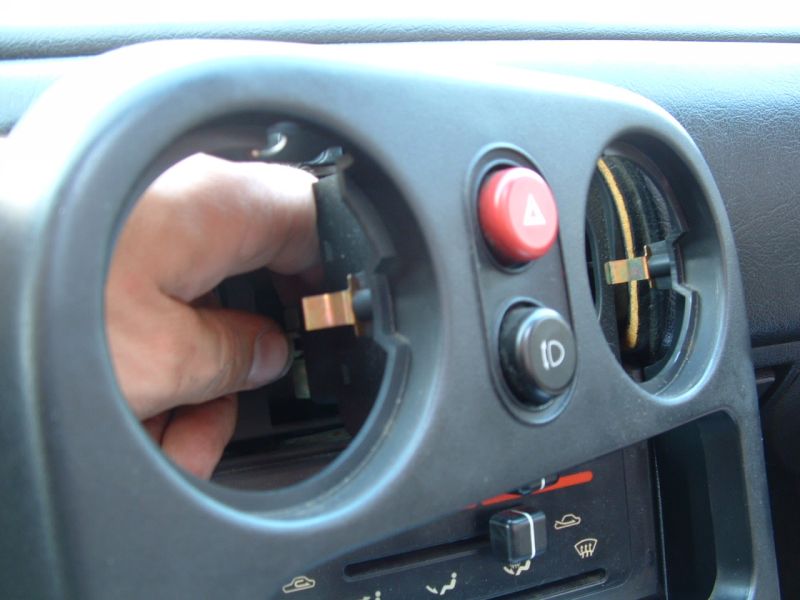
Next remove the vent balls. They can be really tight. And there is a real chance here to do some damage.
Insert a (strong) rope into the ventilation ball. You can use the iron wire to fish end:
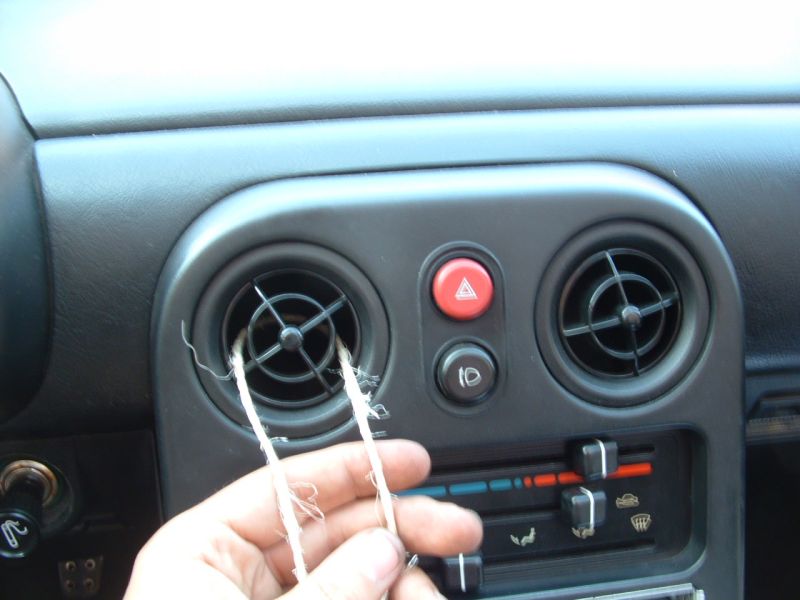
After this it is only a matter of a (hard) straight pull. Then it should come out. The ball is secured on both sides with two spring clips. There is a ridge on the ball that holds it tight. You therefore have to pull very hard, with the risk that you break the entire panel. Caution is recommended here! Keep one hand at the edge of the opening to support the center panel.
View of the inside of the ventilation channel with spring clip:
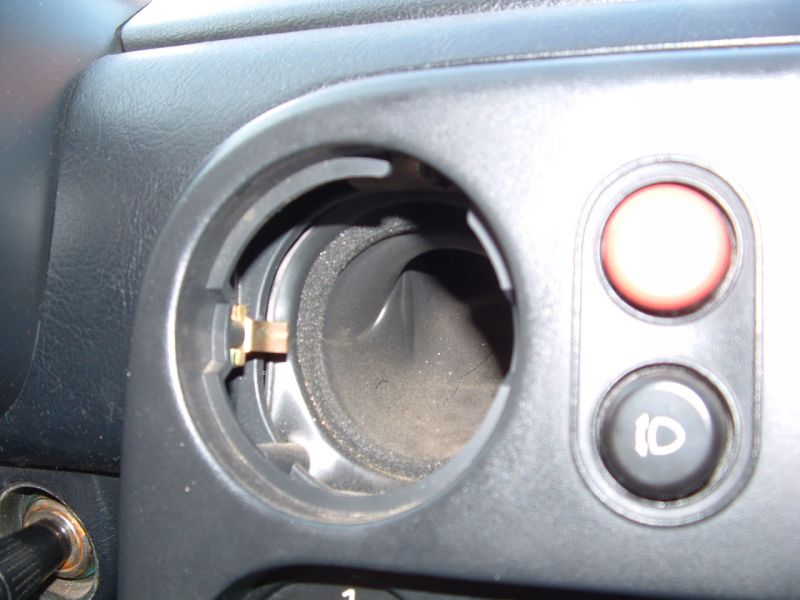
Ventilationball:
The center console is fitted with three screws. Two on top 'inside' the ventilation channels:
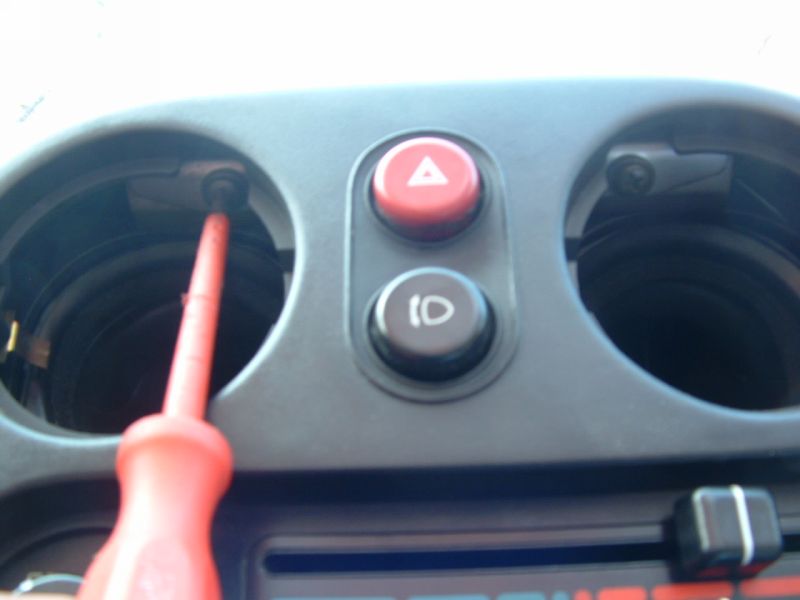
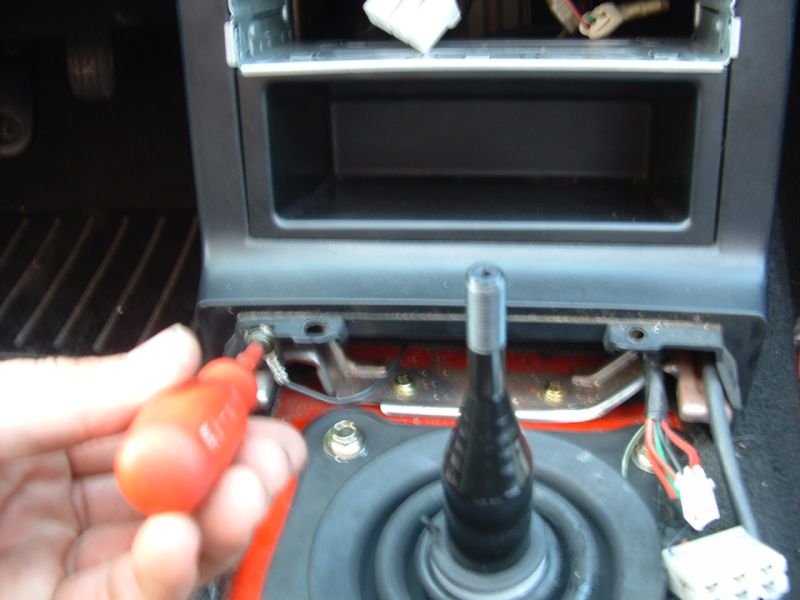
and one on the front bottom left:
When these are undone you can pull the panel straight towards you. It is held to the dashboard with a few clips:
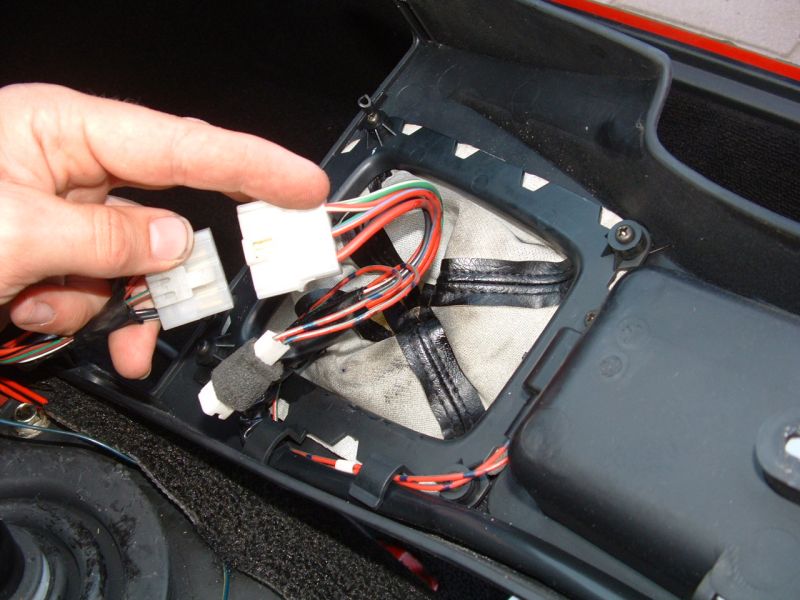
You have to remove the connector to the headlight and indicators:
Rear view of the center console:
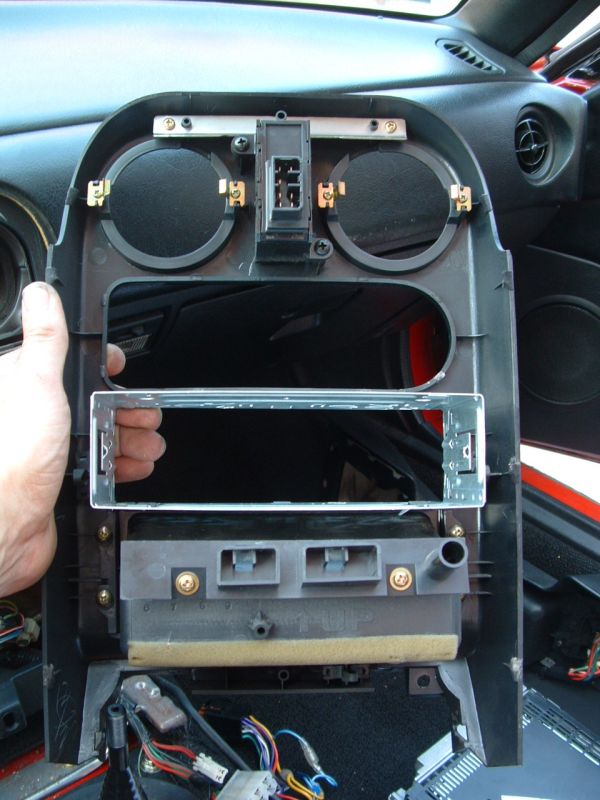
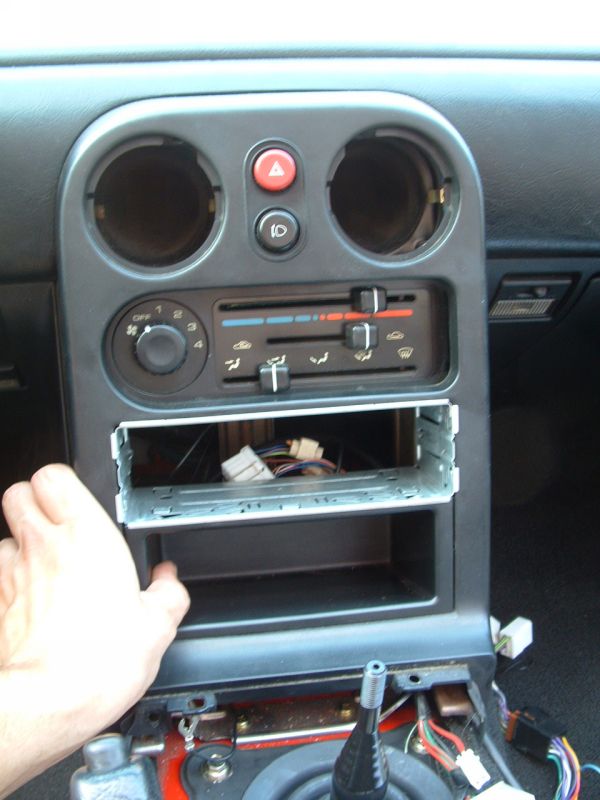
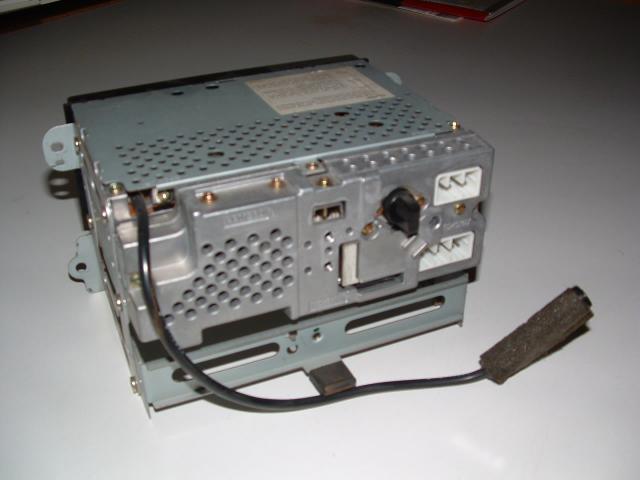
Now you can remove the radio. The OEM radio is fitted with four screws. An aftermarket radio will probably be installed with a radio frame similar to the pictures above.
Now you can install your accessories and/or your new radio.
Below the diagram to the standard Mazda Head unit (Panasonic)
Large connector (CN701):
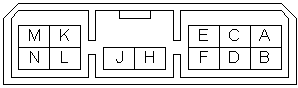 |
A = switched wire from the ignition B = (unused) C = permanent power D = (unused) E = lights/illumination F = (unused) H = (unused) J = (unused) K = door speaker Left + L = door speaker Left - M = door speaker Right + N = door speaker Right -
|
Small connector (CN702):
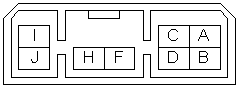 |
A = headrest Left + (for the driver and passenger the Left speaker) B = headrest left - C = (unused) D = (unused) F = headrest Right + H = headrest Right - I = (unused) J = (unused) |
Newer radios are usually fitted with a standard ISO connector. In practise 'standard' is not always 'standard' but these are the schematics to the ISO 10487 norm
 |
Connector A (lpay attention to the clip, is on the lower side)
Connector B (pay attention to the clip, is in the middle)
|
When you have prepared and tested your new radio/accessory you can fit everything.
TIP: before you put the frame back on, grease the clips. So it will come off more easy next time.
Do not forget to plug the connector to the headlights and indicators!
Next fit the center console. If necessary fit the connectors to the windows and center light:
Next first fit the levers at the back and then lower the front. It should simply slide into place. If it gets stuck there probably is a wire in the way.

Fit the screws and put the gear knob back on
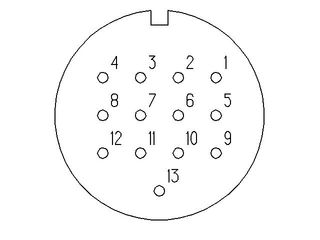
Addition to the original radio:The Mx / Miata was originally supplied with a Panasonic radio. This radio also has a connection on the rear for controlling the (optionally available) CD player. This output can of course also be used for controlling all kinds of external equipment. For example a CD player from another brand, a mini-disc player, iPod, etc.For this you will have to figure out the control of the external device yourself and make a cable harness / adapter plug. The plug connection at the back of the radio is a DIN13 type. This should be available at an electrical specialty store.
Layout of the DIN-connector:
 |
|
sources:
wikipedia
www.isham-research.co.uk/.../isopin.html
www.sonic.net/.../wiring-for-sonycd.html